
Sourdough bread
Cooking, baking, eating: That’s what we love to do together with friends. For good reasons, this is unfortunately not possible in 2020 / 2021. As a small replacement, we have therefore come up with something new: Cook for 2! & Friends. In it we present recipes of our friends that we find exciting.
We start with this delicious sourdough bread. The recipe for his absolute favorite bread was sent to us by our friend Ralf:
The following recipe is based on inspiration from a baking workshop at Susanne Mitai.
I love breads from sourdough and have experienced that they are very grateful and “robust”: except forgetting salt, it is hard to go wrong.
I like to experiment with the grains and the additions, combining them freely as I see fit. Up to 200 g of nuts and seeds and up to 2 carrots can be added well to the dough (if it becomes more, the dough pushes up the lid of my loaf pan as it rises and swells).
Total time
2 days
Baking time
90-105 min.
Servings
1,5 kg bread
Favorite Bread Baking Aid:
This is an affiliate link, if you buy these products through this link we will get a small commission.
Ingredients
Pre-dough
- 500 g rye or barley (fresh, coarsely ground)
- 750 ml lukewarm water
- 200 g sourdough starter of the same variety
(regarding the quantity see below in the tips).
Main dough
- 300 g freshly ground wheat, spelt, oat or buckwheat flour (or a mixture)
- 1-2 grated carrots
- 3 level teaspoons sea salt
- Optional: 200 g nuts or grains
Special kitchen utensil
- Loaf pan, ideally cast iron
Size: approx. 35 x 13 x 14 cm (for a 1.500 g bread)
Timing
I assume you already have a starter (if not, look below at the tips)
1st day evening: prepare pre-dough, soak nuts and grains.
2nd day in the morning: prepare the main dough
2nd day at noon (4 h later): Now it’s time to bake!
Day 3: Ideally, only now cut the bread 🙂
Preparation
Sourdough bread – The pre-dough
The amount is enough for a large loaf pan. I use one made of cast iron. If you only want to bake a small loaf, simply halve the quantity.
Mix ingredients with a wooden spoon and cover. I let the pre-dough ferment overnight for about 12 hours in the warmest place (or at room temperature) – for me, that’s on the underfloor heating in the bathroom.
Before further use, remove a jar of sourdough (approx. 200 g) as a starter for the next sourdough bread. So I don’t accidentally forget in the morning, I always put an empty jar on top of the box.
Sourdough bread – The main dough
Preparation
If you love grains, or like me nuts in their bread, feel free to add them, the amount should not exceed 200 g in total:
For example, walnuts. Or sesame seeds, sunflower seeds, cereal seeds, flax seeds or similar. You can mix nuts and grains as you like.
Because I like hazelnuts so much in bread, I add up to 140 g of hazelnuts. In addition, a total of 60 g of sesame seeds, sunflower seeds, cereal seeds and flax seeds. Just try how you like it best – the ratio is absolutely arbitrary / to taste, but just together no more than 200 g.
Important: Soak all these ingredients in water overnight.
To sprinkle the bread, I use two handfuls of pumpkin seeds. Soak these in water overnight as well.
By soaking, the seeds soak up and do not remove moisture from the dough during baking.
Preparation
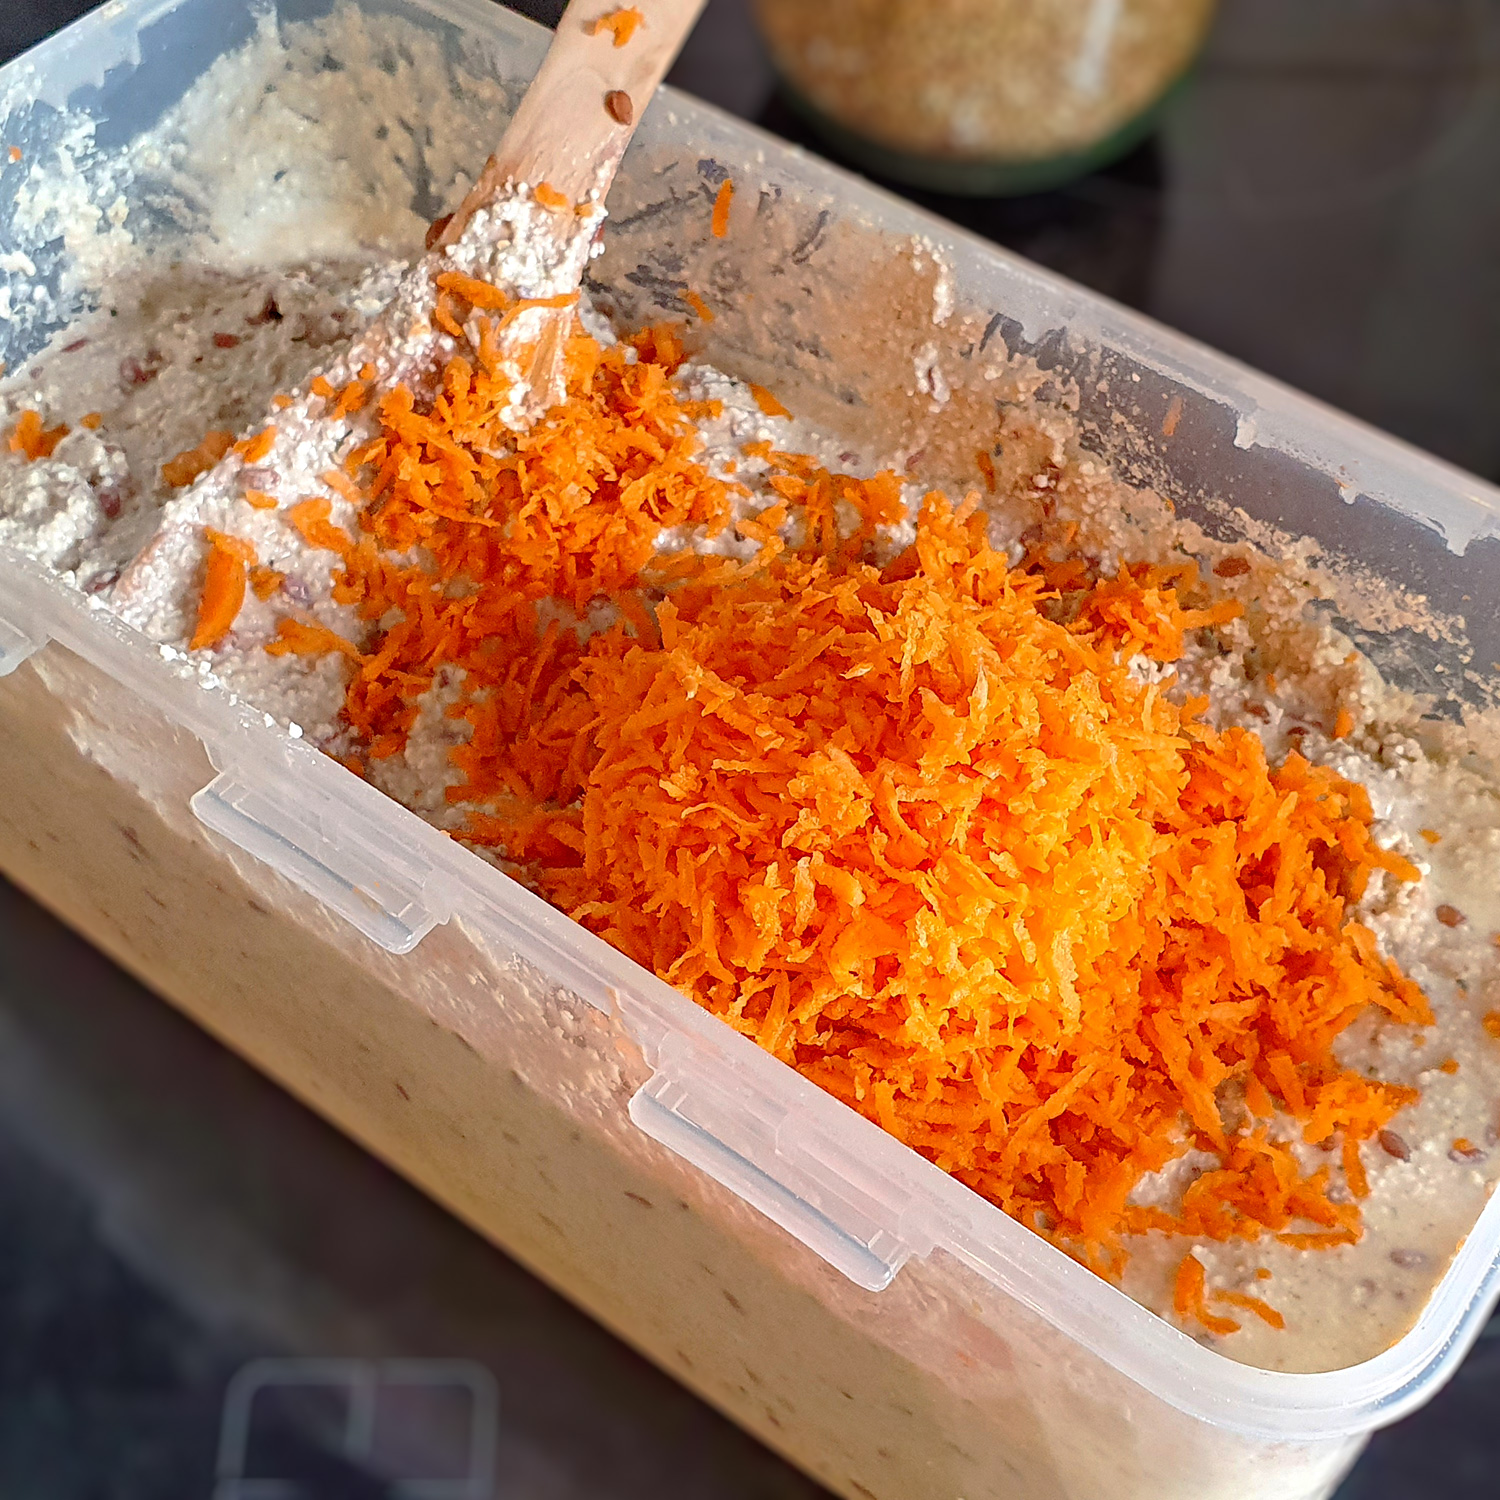
Mix the pre-dough and the ingredients of the main dough with a wooden spoon.
Stir in nuts, seeds and/or carrots.
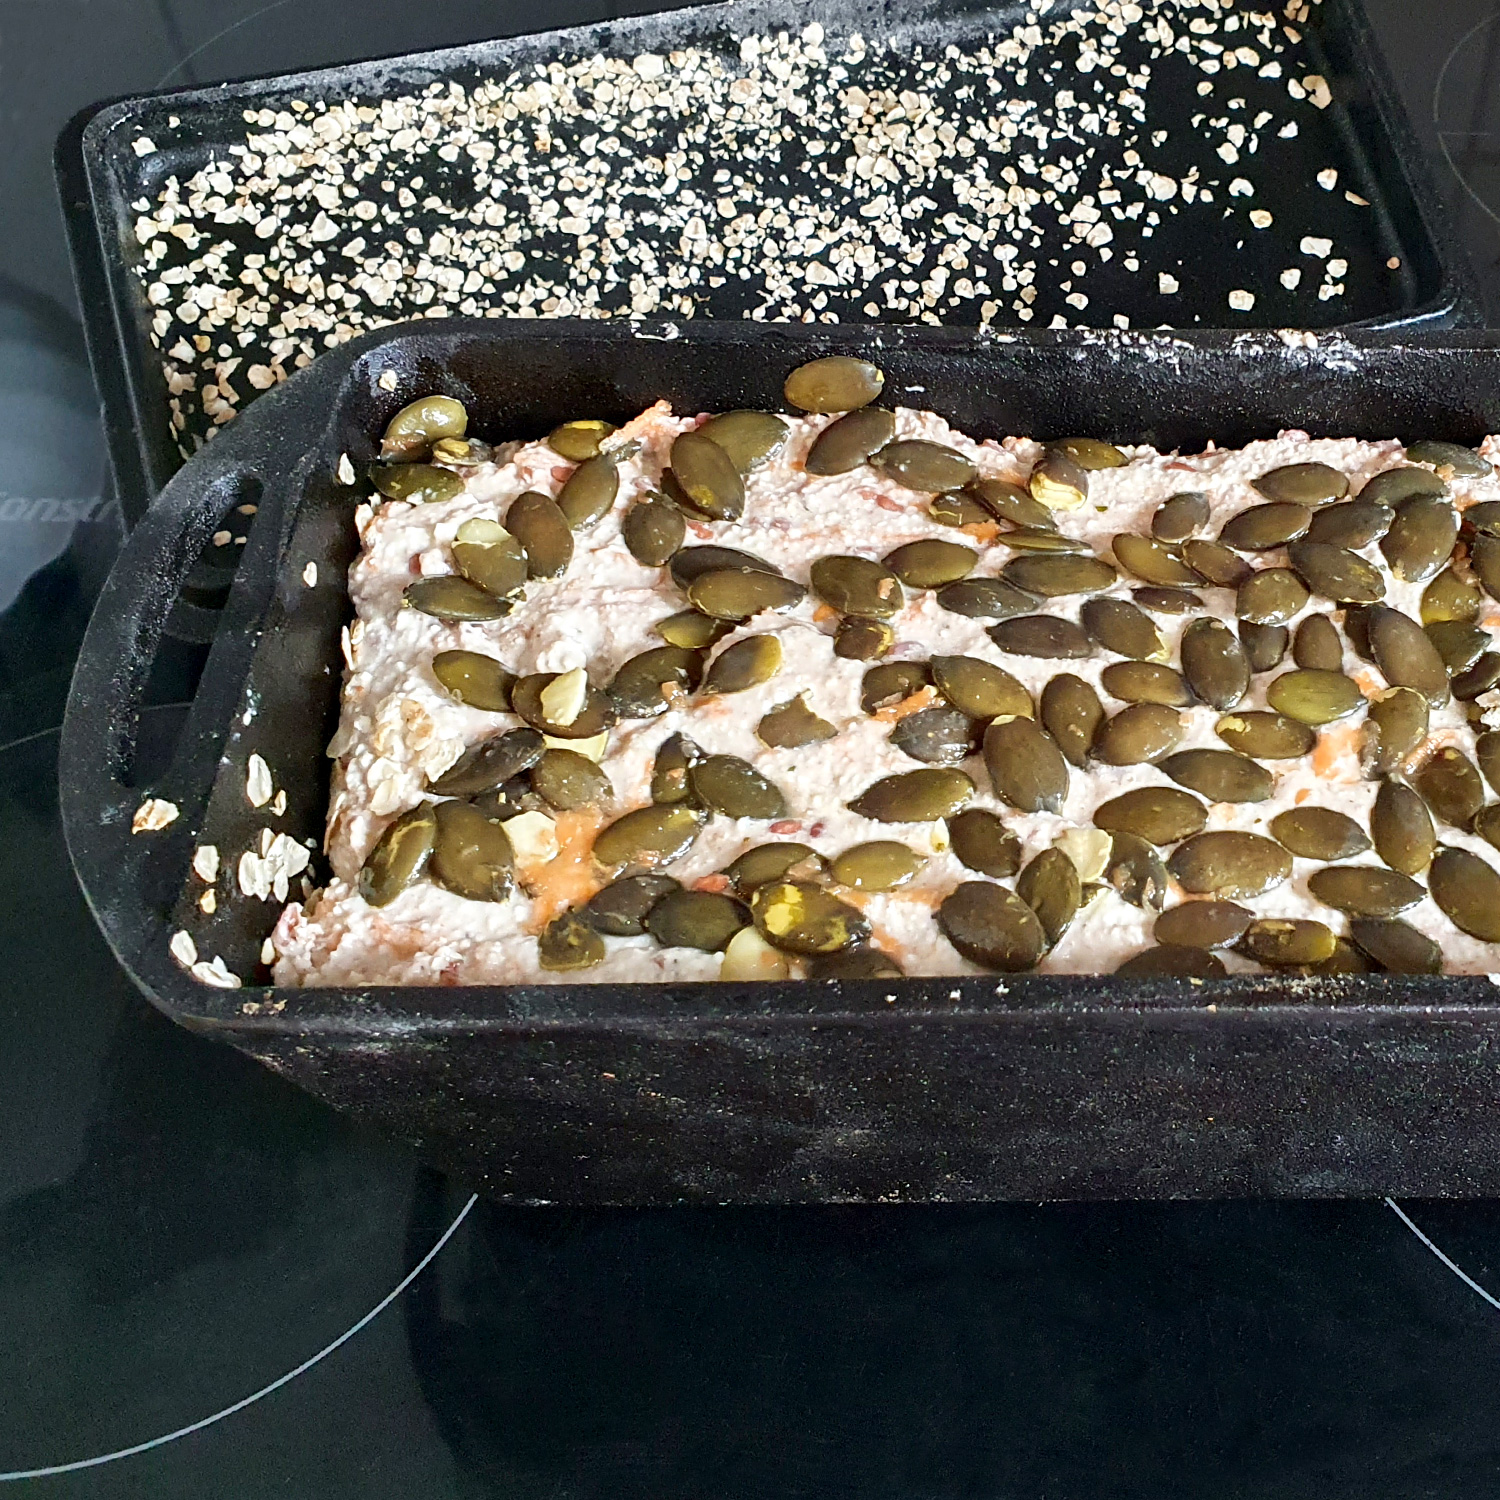
Grease the loaf pan with butter (or coconut oil), sprinkle sesame seeds or freshly flaked oats into the pan. This makes the bread crispier and easier to remove from the mold.
Pour in the batter, smooth it out and sprinkle with the pumpkin seeds.
Leave to rise for 3-4 hours in a warm place or at room temperature.
 |
 |
 |
Sourdough bread – baking
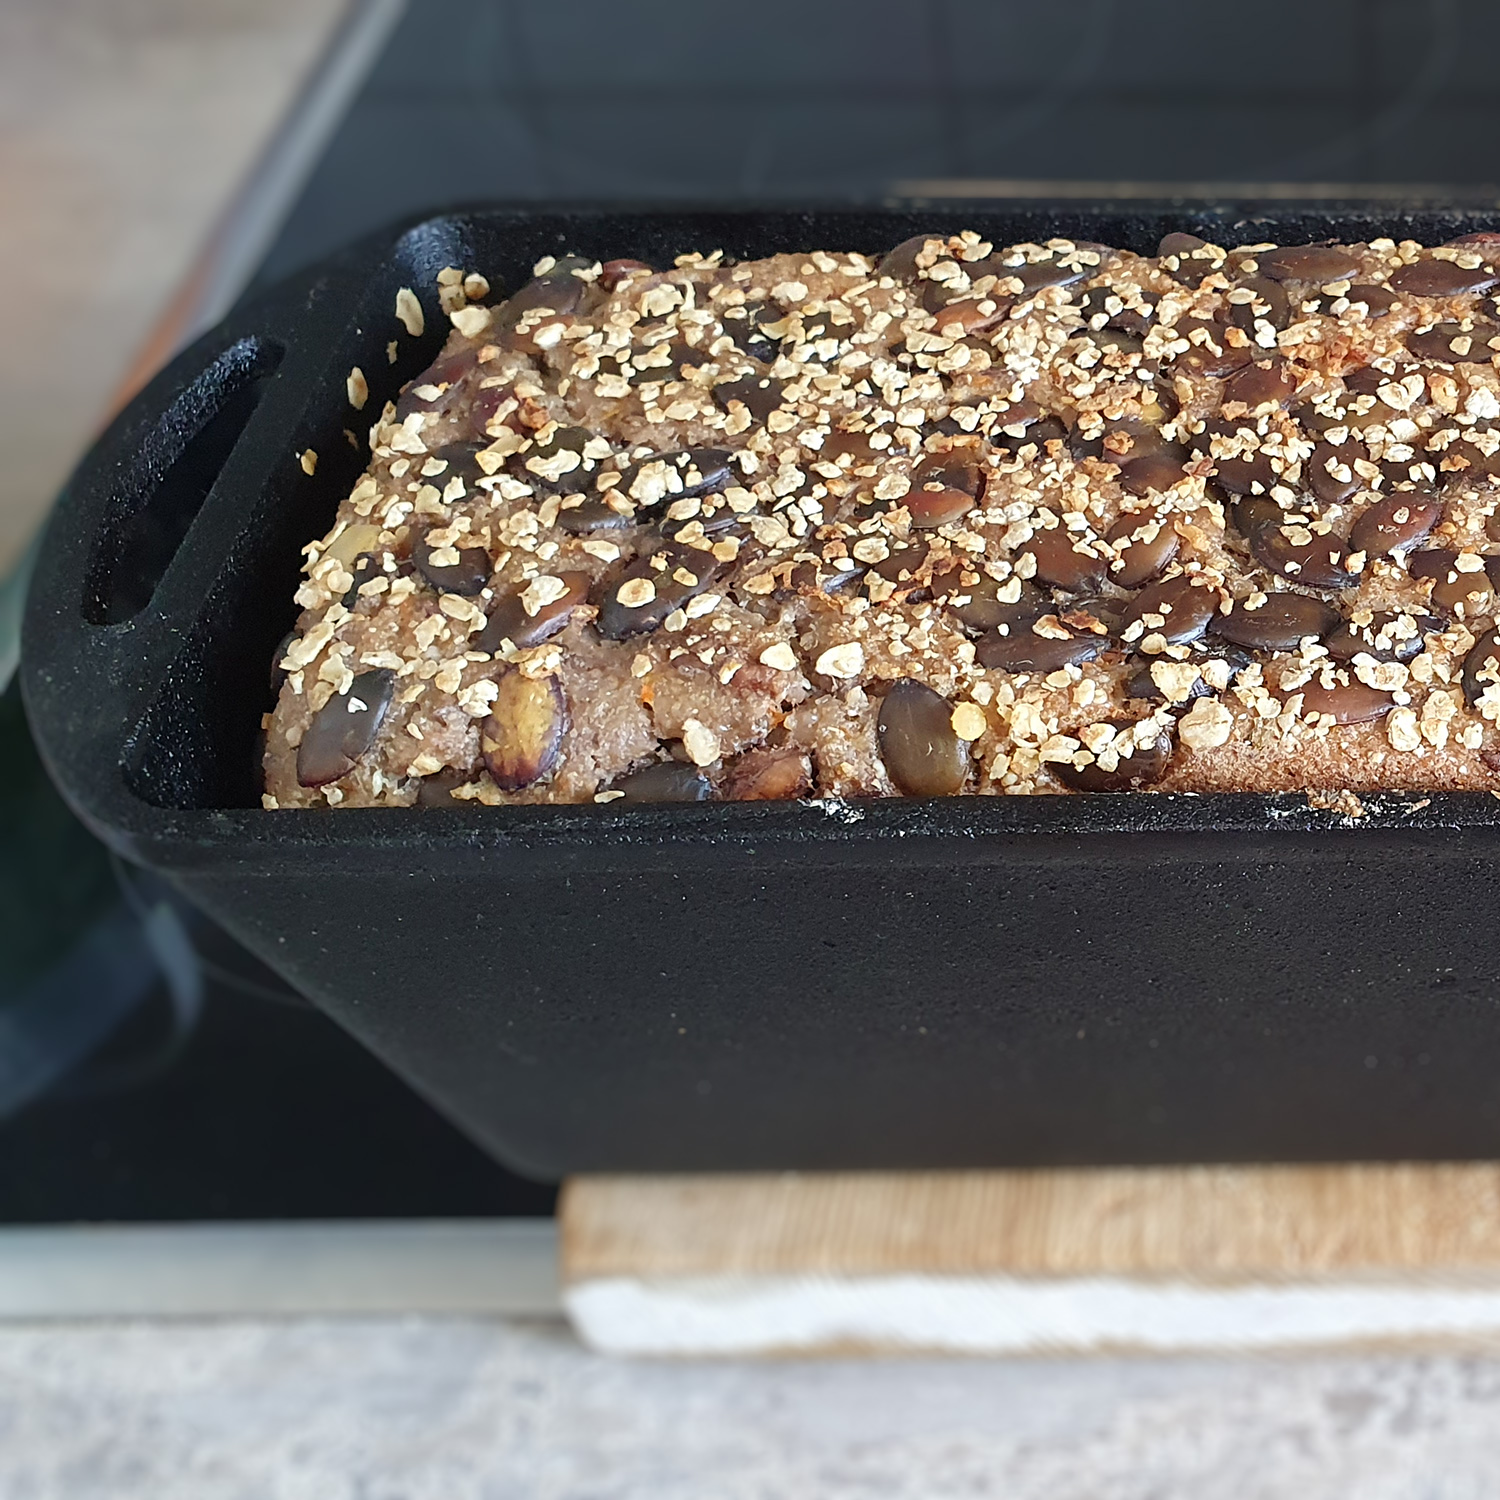
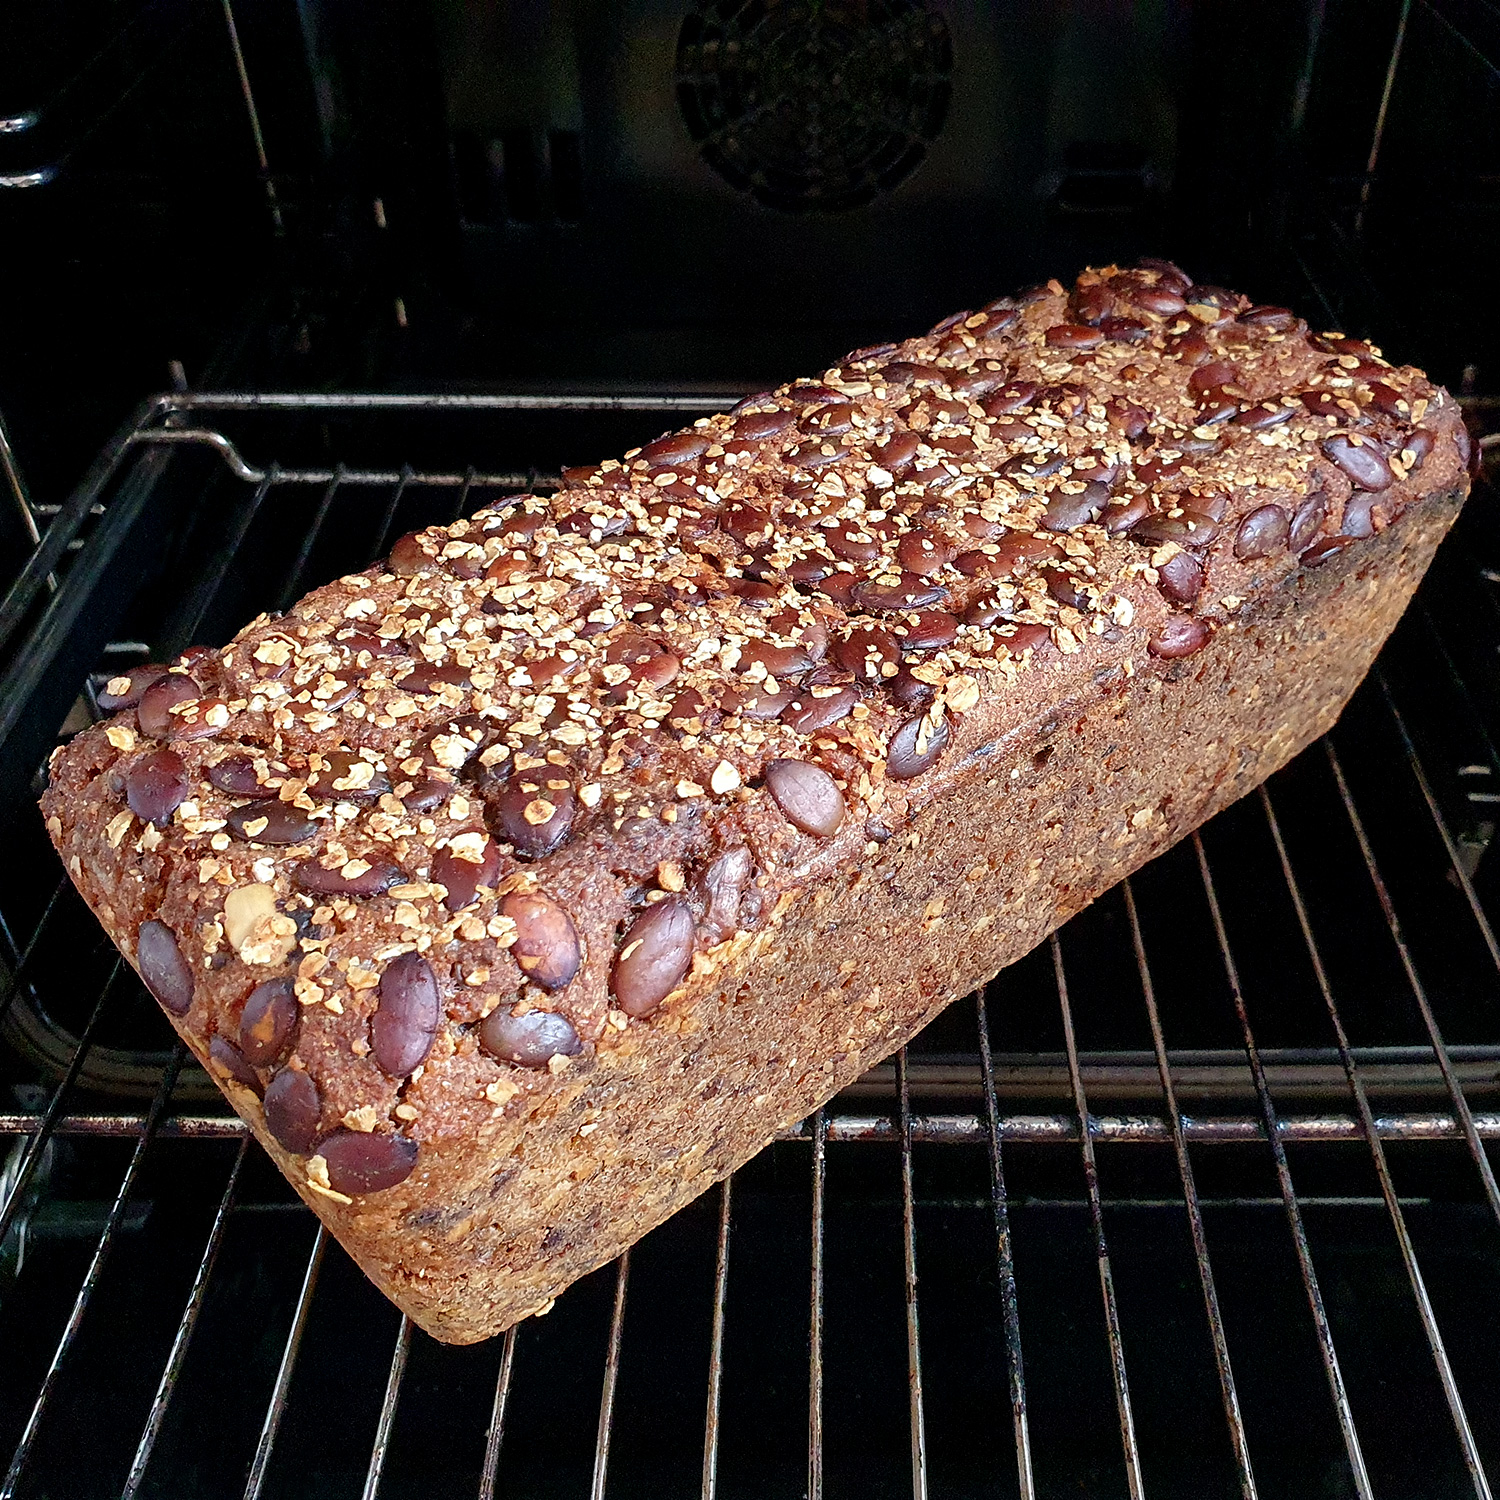
Preheat the oven and bake the sourdough bread for about 45 minutes at 200° on the middle rack with top and bottom heat. Turn out of the mold and bake for another 45 – 60 min. depending on the desired crispness and moisture content of the filling. Bake to the end without the mold at 180° (see the instructions at the end).
Let cool on a rack and (according to the textbook) do not cut until the following day.
In the recipe, you should pay attention to the ratio of ingredients. Only from the starter dough can easily take more if you have too much left.
 |
 |
 |
Experience, tips and tricks
Sourdough starter
For a 750 g sourdough bread, 100 g starter is sufficient. I usually take off 200 g of starter so that I am spontaneously able to bake even a 1,500 g loaf. To keep the amounts from changing, I make sure to take off the same amount that I added to the pre-dough before making the main dough. However, more starter in the sourdough does no harm, there is no “too much” here.
Before the first baking you must have a sourdough starter: If you don’t want to make it yourself (it takes at least 4-5 days, but it can take a few months for it to “grow up” – i.e., to be properly functional), ask for it at organic bakeries or order it on the Internet. I got my initial starter dough at Susanne’s baking workshop.
There are many instructions on the net for making your own.
Note Marion:
Since I’m a big fan of the Plötzblog, here comes the link for his tutorial:
https://www.ploetzblog.de/faq-archiv/wie-stelle-ich-sauerteig-her/However, I have always failed at making an adult starter and will check with my favorite bakery for my next sourdough bread.
In my experience, the starter will easily keep for 14 days in the refrigerator without feeding. If you do not use it for a long time, you should feed it once a week with 50 g of flour and 50 g of water. You can also freeze it. Frozen, it should keep for six months or more. In case I forget to fill myself with starter, I froze 200 g – but so far I haven’t had the need to defrost it.
Why I grind my own flour
Wheat and whole wheat flours are sold in paper bags and keep for several months in them. When I grind flour fresh and also store it in paper bags, the bags get greasy after about 2 weeks and the flour starts to go rancid after 4-6 weeks.
The “trick” is that the components of the grain – hull, endosperm and germ – are separated in industrially produced flours and only then milled. The fat is rendered “harmless” in the process, so that the flour has a longer shelf life. In the process, valuable nutrients are destroyed.
This even applies to (organic) wholemeal flour: wholemeal simply means that all the ingredients are subsequently reassembled. It says nothing about what happens to the shares in between. Organic only concerns the cultivation, not the subsequent treatment.
Particularly harmful is flour from wheat that has been modified through breeding. This wheat alters the intestinal barrier by increasing the permeability of the intestinal wall, allowing substances to enter the blood, which are subsequently attacked by the immune system, leading to numerous foci of inflammation in the body. This can be a cause of allergies, neurodermatitis, multiple sclerosis and even depression. If you want to read about this in more detail, I recommend this article: https://www.foodfibel.de/blog/weizen-gluten/
If I use wheat flour, then only from seed-stable grain in organic quality, which I grind myself.
Baking in the loaf pan with lid
Compared to a simple open mold, a heavy cast iron loaf pan behaves more sluggishly because it takes longer to heat up. It transfers the heat to the inside, thus the bread receives heat evenly from all sides. A lid ensures that the moisture is retained.
Oven temperature
Since I noticed that the measured temperature in our oven deviates from the set temperature by up to 40° (!), I use an oven thermometer when baking. To reach 200° Celsius in our oven, I have to set 240° and for 180° Celsius about 210°. Every oven is different: you have to try, observe and get a feel for your own oven.
Wooden spoon
Ferments do not like metal. In this respect, I also use only wooden spoons for stirring sourdough. With kefir, I think this is important. Whether this also makes a difference with bread dough, I do not know. However, it can not do any harm in any case.
Baking time
Our oven takes 20 minutes to reach 200°. I got into the habit of putting the bread already in the unheated oven and in this respect it is 65 instead of 45 min. to bake.
I like the breads very crispy. I have found that I need to extend the baking time when the dough is very moist: the other day I baked a rye bread with flax seeds instead of sunflower seeds, as well as with two carrots instead of just one. Flaxseed absorbs much more water and the filling possessed considerably more moisture. After 45 minutes of baking out, the bread was not crusty at all, but the way my wife likes it.
I then repeated the experiment and gave the bread an hour to bake. Then it was fortunately again as my wife does not like 😂.
With humidity, temperature and baking time, you also have to experiment a bit and develop a feel for your favorite bread.
Cooling down
Theory says breads should cool overnight. Presumably, this makes them more digestible. However, I don’t stick to it and like to cut it after just 1-2 hours. In exchange, I accept that a little more gas forms in the intestines during digestion. Since I eat vegan, however, these “exhaust fumes” are odorless and do not really bother me.
Stale bread
I read in a guidebook that the process of becoming stale begins immediately when the bread finishes baking. In this respect, it is generally recommended to keep the bread in a linen bag and in a bread box made of clay or wood. However, the crispness is lost more quickly in the bread bag.
I have found that I still really like the bread even when it starts to dry out. It tastes different and can become very hard.
Since I’ve been baking my own bread, it’s never gone moldy, even when I’ve left it outside for a week and a half. From my family, however, then no one but me likes to eat it 😂.


